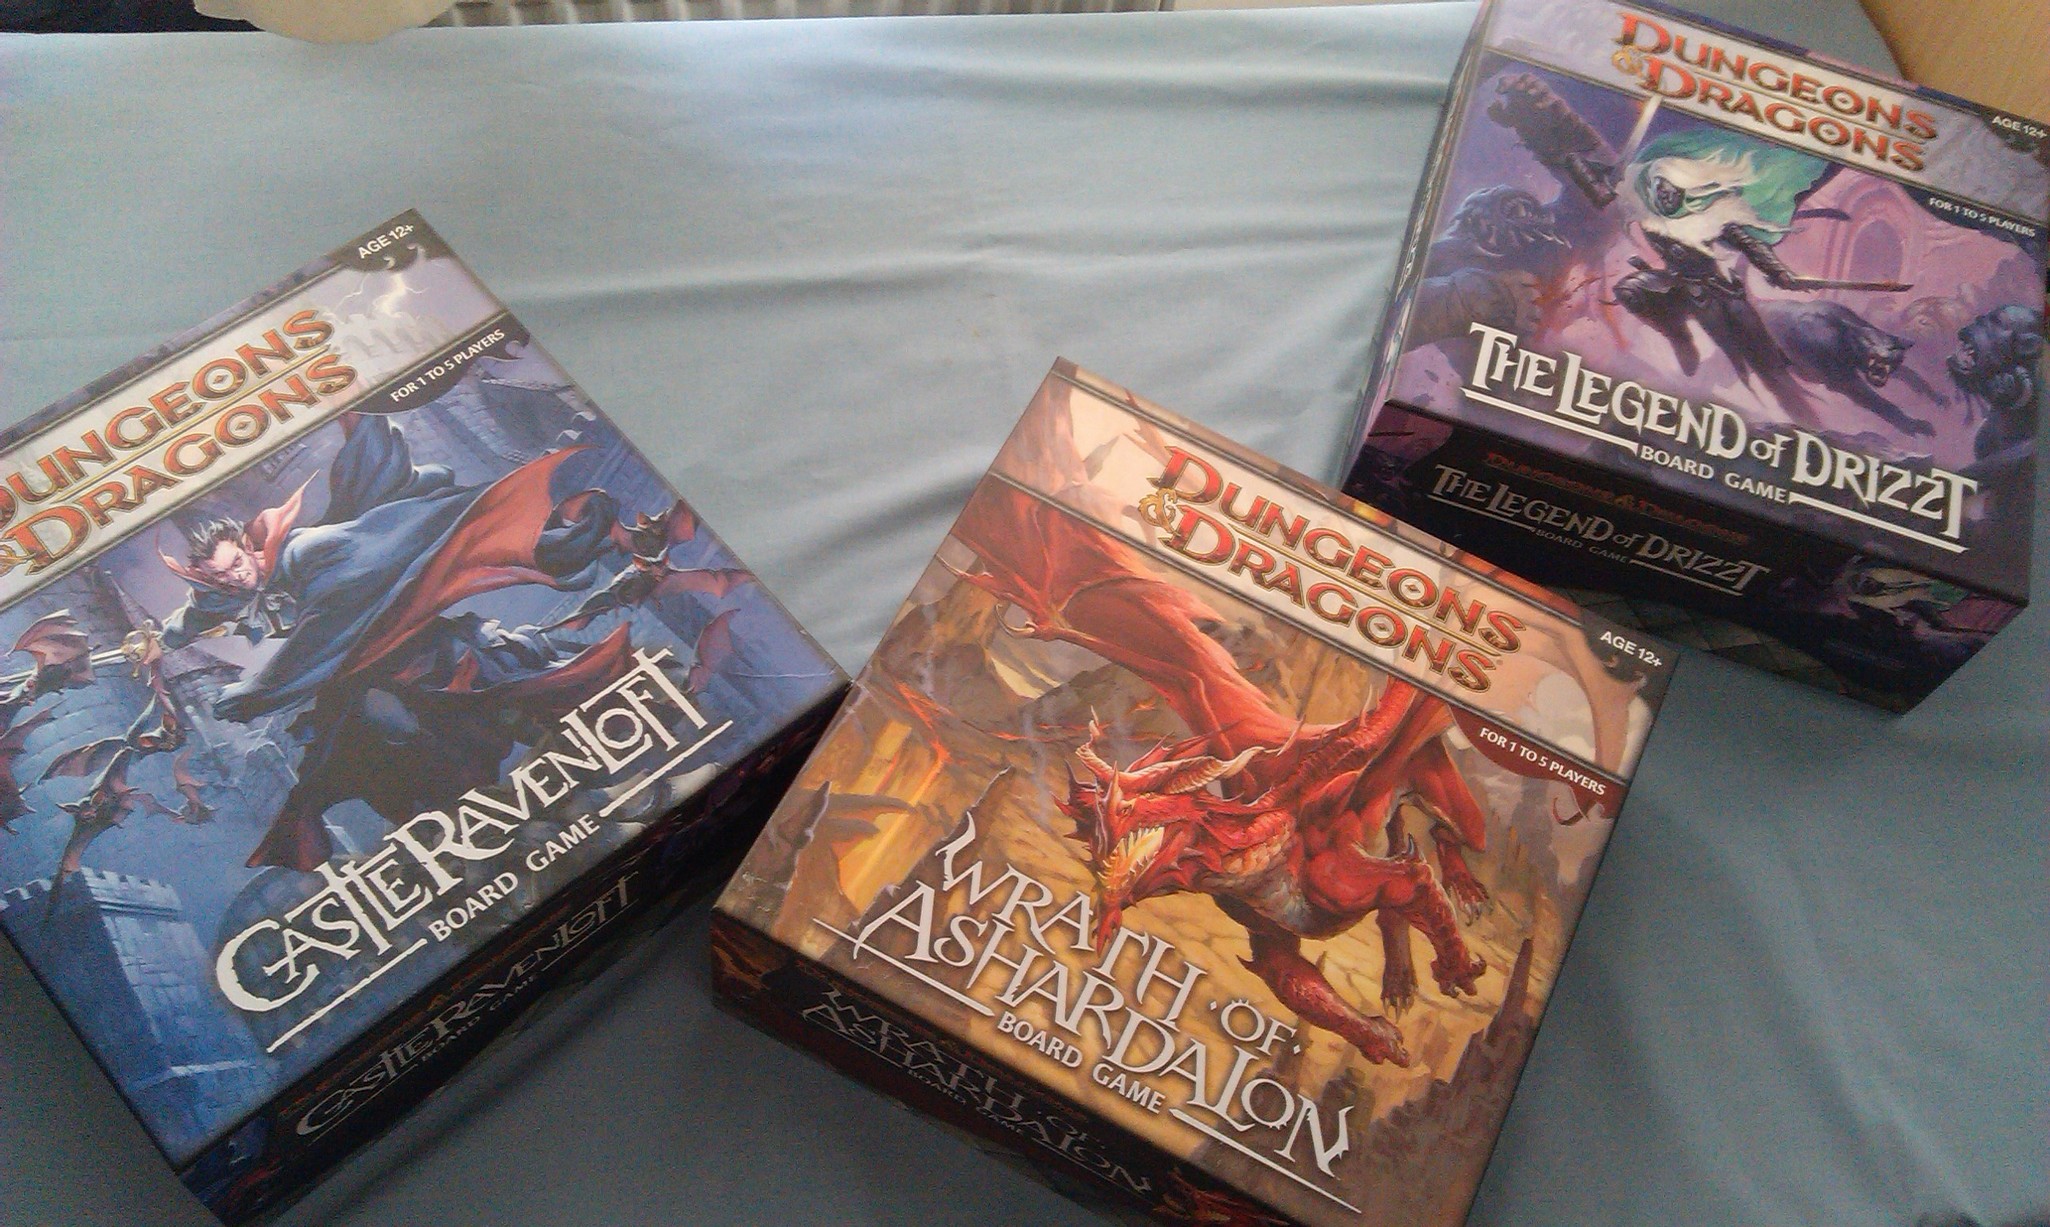
Storming (Err…. Escaping) the Temple of Elemental Evil
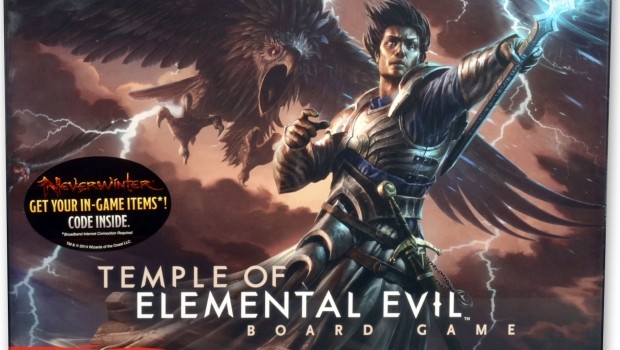
I’m sure you read my look at the Dungeons and Dragons Adventure Board Game series. I mean, who hasn’t? Anywhoo, I decided to try and solo the first adventure in The Temple of Elemental Evil (ToEE). I’ve not played Castle Ravenloft, but so far, I’ve found Legend of Drizzt to definitely be the easiest of the series, with Wrath of Ashardalon much tougher. After a few plays of Temple, I determined it to be even harder to win.
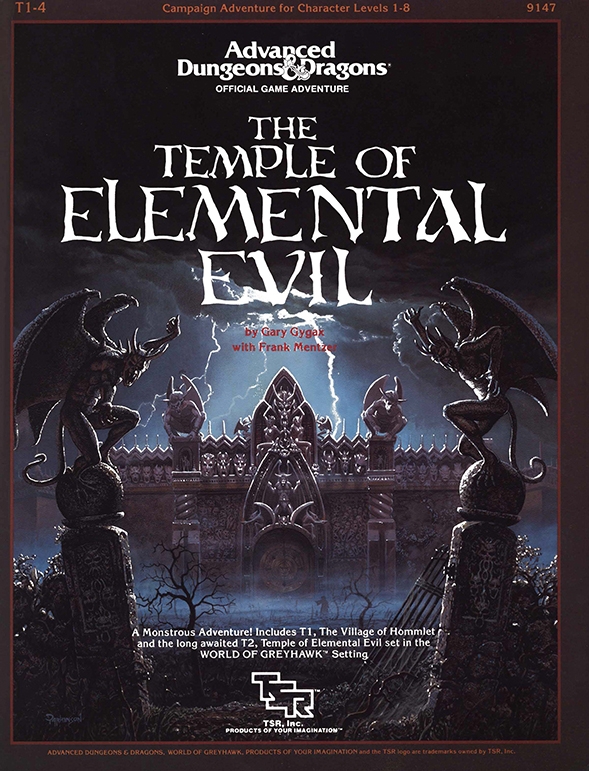
ESCAPE – That’s the name of the adventure. This one begins with the Massacre Site tile, rather than the Start Tile. Somewhere between the eighth and thirteenth tiles is the Guard Room tile. Once you find that, you lay the Start Tile next to it and if you can end your Hero Phase on the Start tile, you win.
Knowing how brutal this game is, I chose to play Barrowin, the female Gold Dwarf Cleric. Her healing power would most definitely be needed. Her stat line is 16 AC, 8 HP, 5 Speed. And when she uses a Daily or Utility power, one hero (which can be her) on her tile regains 1 HP.
I also House Rule that the monsters do not attack on the turn that they are placed. This is a big change, but I think that ToEE and Wrath are extremely difficult to win without that change.
You can click on the pictures to enlarge them and get a better look at what’s going on.
How did I do? Well, Barrowin made it to the 14th turn, which is at least a moral victory. See how it all turned out below.
The setup: Your party came into the Temple seriously overconfident and woefully under prepared. They’re all dead and you need to escape from this nightmare.
1st TURN
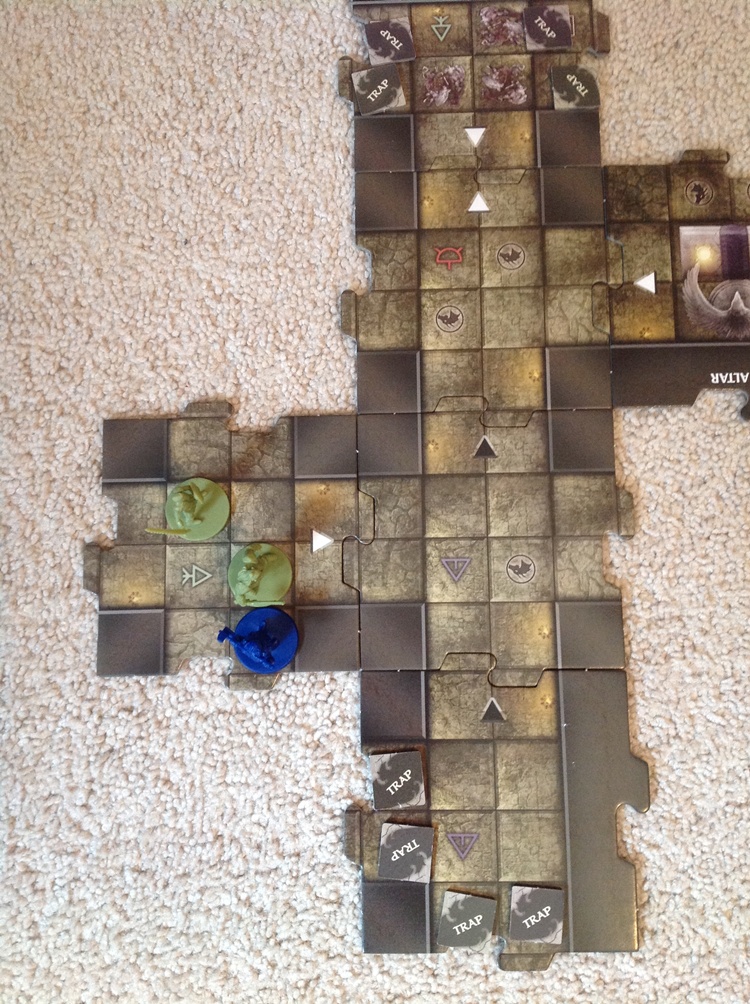
With a wall on one edge and traps blocking two sides, Barrowin heads to the open edge of the tile to explore. Tally ho! Ok, that’s not very dwarven – how about ‘Chakka shok! Chakka kor! (2 points if you get the reference. 2 more if you translate it).
Potion of Knowledge – To clear a trap, you enter its square and roll. 11-20, you disarm it. 1-10, you set it off. Some traps are ‘fakes’ and have no effect: others do damage. A 4 point trap is a major drag.
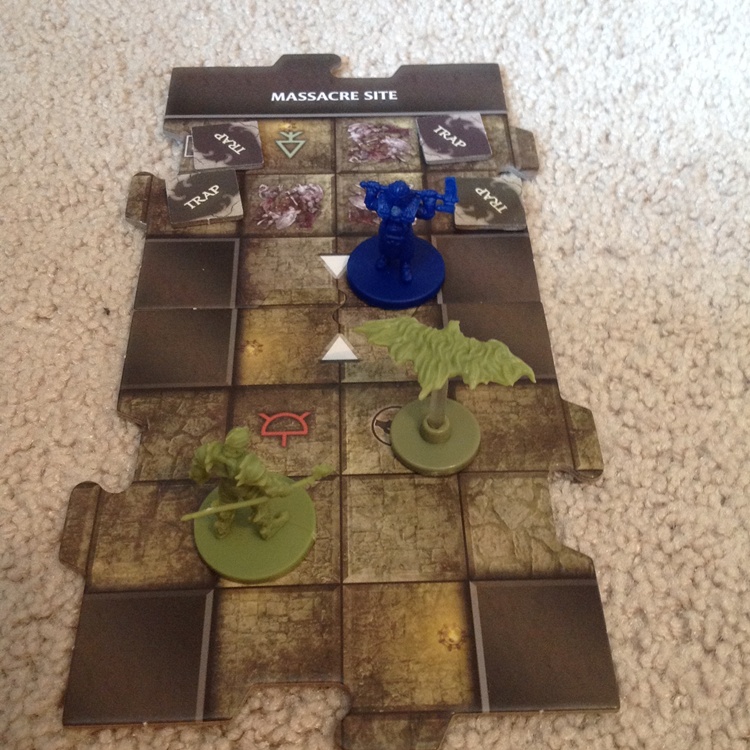
I drew a new tile, with a white triangle, meaning no Encounter Card (Yay!). A black triangle requires you to draw such a card, and they are NEVER good. But this tile did have two monster symbols, so I drew two Monster Cards and placed a Fire Bat (14 AC/1 HP) and an Earth Cultist (14 AC/1 HP).
Potion of Knowledge – Except for special circumstances (as with Legion Devils in Wrath), you only placed one monster on a newly explore tile in previous games. But in ToEE, a tile has different numbers of monster symbols (see the two symbols of dragon heads in 2nd Turn), ranging from none to three. So, when you flip a tile, you don’t know how many monsters you’re getting.
2nd TURN
New to ToEE are Special Abilities for some monsters. For example, when you kill a Fire Cultist, each hero on that tile takes 1 damage. So, melee combat with one is fraught with fire peril! Being a savvy dwarf, Barrowin skips any movement, stays on the original tile and fires her light crossbow (+6/1 damage) at the Fire Cultist. Since it was AC 14, I only needed to roll an 8 (with the +6) or better. Attackers win ties. Yeah, I missed.
That ended a disappointing Hero Phase. Since Barrowin didn’t move and I didn’t lay a new tile, I completely skipped the Exploration Phase and went straight to the Villain Phase.
And if you don’t lay a tile, you get an Encounter Card. Drat! Oh yay, Magnetic Rocks! (‘These strange, sharp stones seem to be attracted to metal’). Barrowin would either lose 200 gold pieces or have to discard 1 Item Treasure card. Well, she doesn’t have either at this early stage, so “Phhttttt. No effect.” Except it’s also a +7 attack against her, with 2 damage. And of course, it’s a hit.
Since the Fire Bat and Fire Cultist are within one tile of Barrowin, they move adjacent to her and attack. The Fire Bat (+5/1 damage) misses, as does the Cultist (+6/1 damage). So, my miserable crossbow shot doesn’t cost me.
Because you don’t really do anything during your first turn (though you could house rule that you can move onto a newly explored tile at the start and get things going…), Hero play really starts on turn two. Without progressing through the dungeon, Barrowin has run into two monsters and been pelted by stones, taking two points of damage from them, while bouncing a crossbow bolt off the wall.
Something I learned early in playing Wrath of Ashardalon: if you fall behind early, it’s VERY difficult to “catch up” and dig yourself out of a hole. The Encounter Cards keep chipping away at you and the monsters never stop coming.
Though, it’s a bit less like that in Legend of Drizzt. I’m a bit worried here at the beginning of ToEE. At least the monsters only have one hit point each.
3rd TURN
Barrowin slides between the Bat and Cultist like Reggie White ducking between a guard and a tackle and moves to the edge of the second tile. Then she turns and fires her crossbow at the Cultist. A “1.” REALLY?????
Potion of Knowledge – I’ve tinkered with the idea of a “1” being a Fumble: like a ranged attack hits a nearby Hero or a weapon is dropped and can’t be used next round. I haven’t implemented anything yet, but I think there’s potential for some fun, as well as some significant impacts.
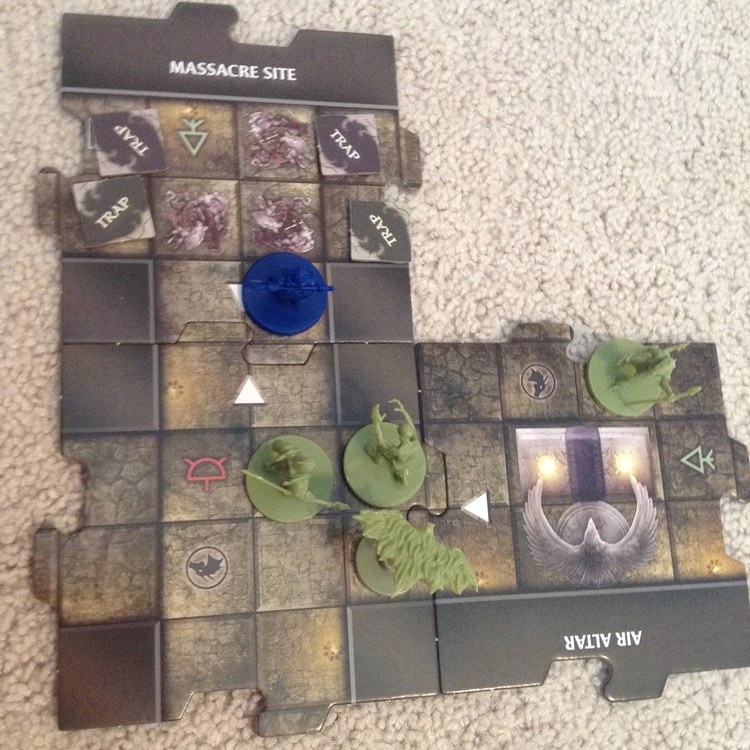
I lay a new tile with a white triangle (two in a row: that’s a stroke of luck), but with two monster symbols. So, I place a Doppleganger (13 AC/1 HP) and a Troglodyte (11 AC/1 HP). Now, at this point, drawing four 1 HP monsters is quite fortunate. But it would help if I could HIT ONE OF THEM!
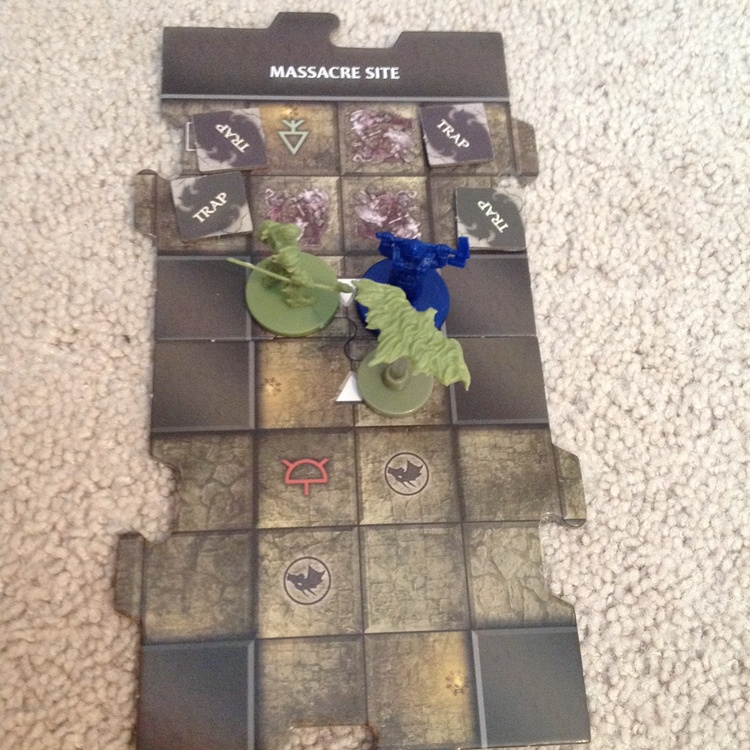
The Doppleganger has a flavorful Special Ability. It takes the Hero’s square while the Hero goes back to the Start tile! As if it were an actual duplicate, replacing the Hero. Neat.
I made a mistake here: I placed the Doppleganger on one of the monster symbols. I should have switched Barrowin and the Doppleganger right away, but I forgot about the Special Ability.
So, I had the Fire Bat and Fire Cultist move over to Barrowin and attack. They both missed. Then I realized my mistake and properly placed Barrowin and the Doppleganger. Only a tiny bit of harm done. The picture for this turn shows the Doppleganger (looking like an oversized Gollum) in the square that Barrowin had explored to. And Barrown right back where she started.
Three turns, two attacks, two misses, four monsters, one Encounter card doing damage. If it hadn’t been for two white triangles, Barrowin would be in a pretty bad spot. It’s not all that great as it is. And with the traps blocking the hallways right and left, running away, while still possible, has its own risks. Not the start I would have liked.
4th TURN
Finally! Barrowin hits the Fire Cultist with a crossbow bolt and kills it. And since she was one tile away, no damage when the Cultist combusts. Had Barrowin moved forward to engage in melee, she would have taken damage. While this isn’t the complexity of re-fighting Gettysburg or Waterloo, tactics and strategy do come into play.
I get a Clarity Treasure Card, which is played immediately and Barrowin heals 1 hit point. Things are looking up!
With three monsters on the board, there’s a strategic advantage to not exploring (suppose I get a tile with 2 or 3 more!), so I draw an Encounter Card instead: Choking Ash: (+7/1 damage). Its’ a hit, naturally. So much for the Clarity card. It also would have activated one Monster on my tile for a free attack, but Barrowin is all by her lonesome. That dwarven reluctance to bathe comes in handy.
The Fire Bat moves next to Barrowin and scores a hit for 1 point of damage. The Doppleganger (+4/1 damage) moves adjacent to the dwarf, but misses. The Troglodyte (+5/1 damage) follows suit with the same result. After those first two crossbow bolts, the dice have been fairly friendly: two monster misses in three attacks
So far, in four turns, I’ve managed just one kill, laid two tiles, taken three points damage and am adjacent to three monsters. This is a bad start. But business is about to pick up!
5th TURN
Potion of Knowledge – The Troglodyte has one of those pesky Special Abilities. If a Hero starts adjacent to it, the Hero gains Disadvantage. Wrath and Legend used Dazed, Immobilized and/or Poisoned Condition markers. They caused some negative effect to your Hero. ToEE has Advantaged (roll two die and take the highest) or Disadvantaged (roll two die and take the lowest) Condition markers, which go away after one turn.
I’m already in a hole, but I’m about to make a sweet play, and the Disadvantaged condition could completely nullify it. So I play Barrowin’s Daily Power, Light, and discard the Disadvantage condition. The Daily Power gets turned face down and I can’t use it again unless something occurs that specifically tells me to turn it back over.
And reading my notes, I made a mistake on my next action. I played a Daily Power, Radiance of Dawn, which lets me attack each monster on my tile (+7/2 damage – still does 1 point on a miss). I attacked all three adjacent monsters when it should have just been the Fire Bat. Oops.
Oh well, filled with the blinding radiance of my dwarven god, I roll three hits, including a 20 on the third one. Now, since all three monsters had 1 hit point, each was a guaranteed kill, but it’s fun to roll attacks. Especially when a miss doesn’t hurt the situation.
Potion of Knowledge – In prior games, a Hero who rolls a natural 20 could exchange 5 experience points (gained from Monster kills) to turn their card over to 2nd level. The Hero is a bit more powerful when they level up. ToEE dropped that to use leveling up as part of the Campaign mode. Instead, a 20 is a critical hit and does 2 points damage.
Since the monster I rolled a 20 against only had 1 hit point, I didn’t need the bonus point of damage for a critical. I’d rather have leveled up…
The board was now cleared and I got a 100 GP Treasure card. You can use gold to advance to 2nd level between adventures or to buy Advancement Tokens, which make your character more powerful or effective.
I had to take an Encounter Card and got Fire Scar. Being within 1 tile of a Fire Elemental symbol, Barrowin took 2 points damage. Stupid Encounters! But what a turn for the good guys. Err…guy. Um…girl…Yay team!
Potion of Knowledge – No matter how many monsters you kill on one turn, you can only earn one Treasure Card. Which seems kind of unfair. Especially since you’re more likely to be adjacent to multiple monsters in ToEE than in the prior games.
6th TURN
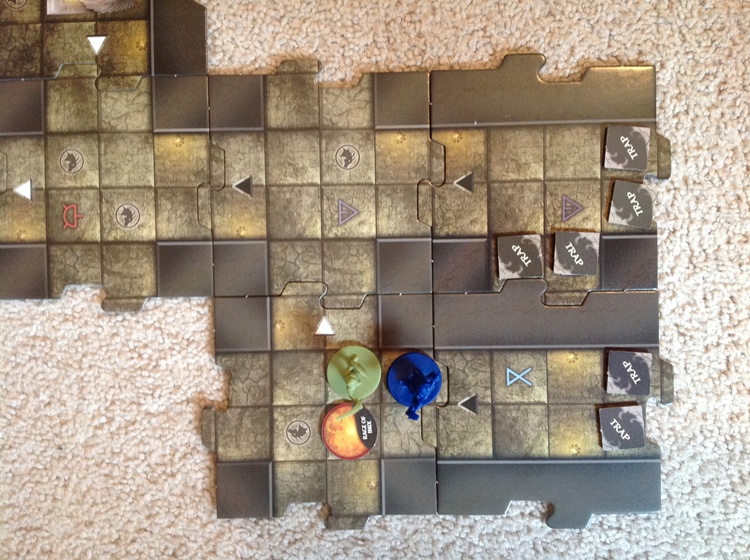
Barrowin moves ahead and I laid a Black tile that came with its very own Fire Bat. Having just been burned by the fire element symbol, a Hail Storm pelts the dwarf. It missed, but that just means 1 point of damage instead of 2.
I forgot to take pictures after the 5th and 6th rounds. Need to work on my documenting skills! In the 7th Turn picture, the tile Barrowin was standing on was laid down on the 6th Turn. the tile directly above that was laid on the 5th Turn.
7th TURN
Barrowin moves to a tile edge and I drew a black tile with no Monsters, but it has four Traps. She turns and smashes the Fire Bat with her war hammer, earning another 100 gold piece treasure. An Encounter Card – oh goody. It’s Grasping Tides (‘A wave of water clutches at your belongings’). Well, it is called The Temple of Elemental Evil. All kinds of weather: kind of like here in Ohio. I didn’t have an Item Treasure Card, so Barrowin takes 2 points of damage.
Potion of Knowledge – Some Encounter Cards have different damage effects depending upon whether you have a minimum amount of gold pieces or not.
8th TURN
Using a Daily Power, Barrowin Cured Wounds and healed 3 points. Which was helpful, since a white tile included a Water Cultist (13 AC/2 HP) and a Hobgoblin Fighter (15 AC/1 HP). The monsters just keep on comin’!
I would have definitely needed at least two Healing Surges if I hadn’t gotten healing treasure items and been playing the Cleric. This is a really tough game – tougher than Wrath of Ashardalon, which can sometimes feel like a grind with the constant Encounter damage.
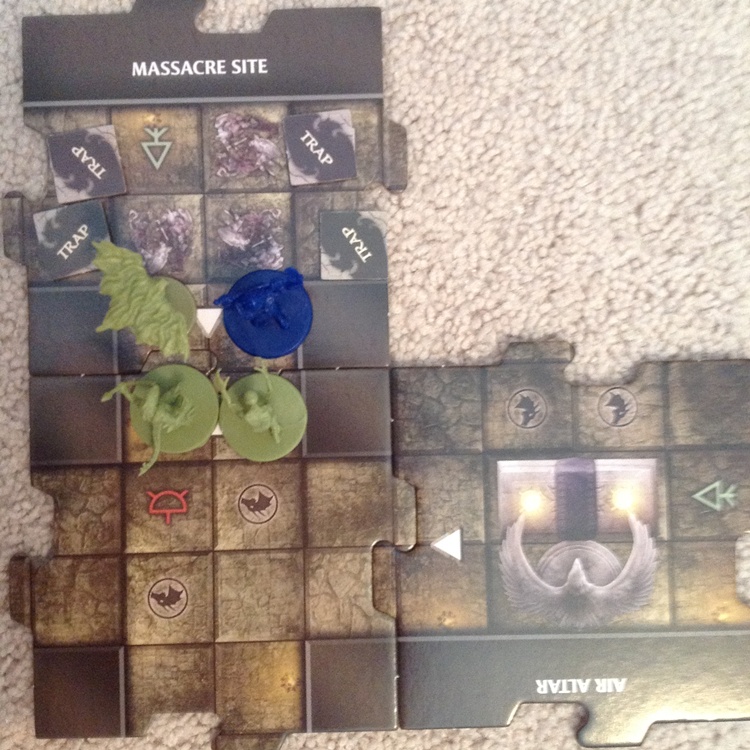
Things looked a bit dicey earlier, but through eight turns, Barrowin is in pretty good shape. The 8th Turn picture is actually an in-turn between the 8th and 9th, which is why Barrowin is next to the Hobgoblin but hasn’t laid a tile yet. You’ll see that in the next picture.
9th TURN
Barrowin moves adjacent to the Hobgoblin and attacks, killing it. The 2 hit point Healing Potion was a nice Treasure. I laid a black tile, which had 2 Traps but no Monsters.
The Encounter Card was Rage of Imix. Argh!
Potion of Knowledge – The Rage of Imix is ToEE’s version of The Mark of Lloth from Legend of Drizzt. If you’re on a tile with a Rage of Imix token and a Rage Encounter card is drawn, you take two points damage. You could get burned with Rage tokens several times in a game. And unlike the Mark of Lloth, which you could get rid of by taking one point of damage, these things don’t go away.
The Water Cultist moves next to Barrowin and attacks but misses. Dwarven armor saves the day.
Potion of Knowledge – In a recent game, I drew four Rage of Imix tokens. And taking two points damage for just standing on a tile, doing nothing, is kind of a blow. Imagine if you had two or three Heroes on a Rage tile, fighting some tough monster or villain, and somebody draws a Rage Encounter Card. That could be a game changer.
Barrowin has three non-Trap directions she can go, with only 1 monster on the board. That’s actually pretty good. However, she is down to 2 hit points (I think: I don’t have that in my notes) and it’s very easy to take 2 points damage in one turn. Blasted Encounter Cards.
10th TURN
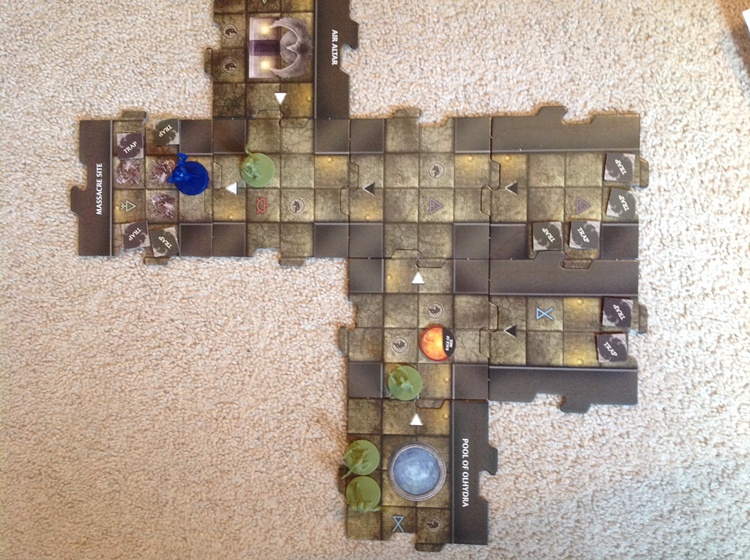
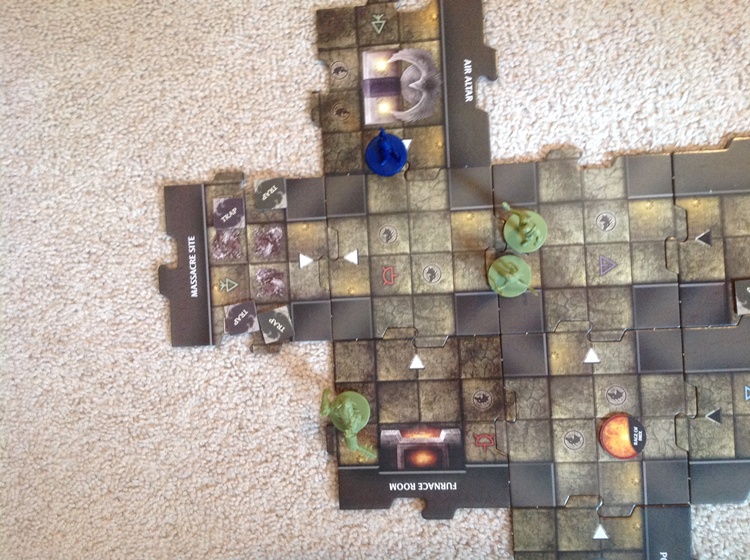
Barrowin smashes the Water Cultist with her war hammer, which does 1 point of damage and moves the monster one tile. Then a move to the edge of the tile resulted in a white tile (No Encounter Card: Wheh!) but 3 monsters. There has been a disproportionately low number of Cultists so far. And it’s a Troglodyte (AC 11/HP1), an Earth Cultist (AC 16/HP 2) and a Doppleganger (AC 13/HP 1)! The Doppleganger replaces Barrowin and she goes all the way back to the Massacre tile. Nice escape!
The Water Cultist, confused at this turn of events, moves one tile towards Barrowin.
So, suddenly we have 4 monsters on the board, but 3 of them are now several tiles away. The Doppleganger’s special ability of sending the Hero back to the Start Tile is unique to this entry in the series and has really had a significant impact. I have not switched monsters between games, but they are fully compatible (as are the Heroes and Encounter and Treasure Cards). Adding a Doppleganger or two into an earlier game could certainly be noticeable. And the later in the game (presumably being further from the Start Tile) you encounter one, the bigger the effect. I like the addition of this monster to the game.
11thTURN
Seems like a fine time to use the Healing Potion, which is good for 2 hit points and is then discarded. After those early misses, Barrowin is rolling much better for attacks and nails the Water Cultist with a well aimed crossbow shot, reducing it to a puddle. And this earns her a very cool treasure, the Healing Ember. It heals 4 points. That thing just might be the best treasure in the game!
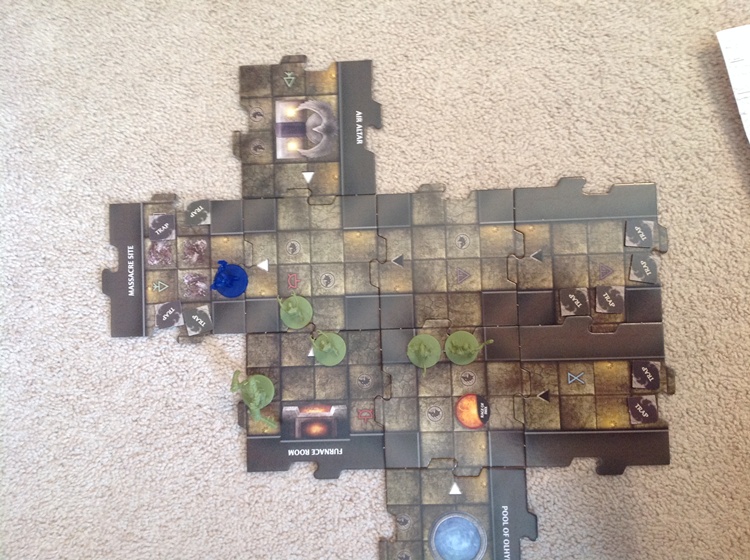
A move one tile up and to an edge reveals a white tile. Thank goodness. But it also comes with a large, ugly Bugbear (AC 15/ HP 2) and Doppleganger #2 (AC 13/ HP 1). Yet another switcheroo puts Barrowin back on the Massacre Tile. We’ve got five monsters on the board now. Doppleganger #1, the Troglodyte and the Earth Cultist all move one tile towards our Hero.
At the end of the 9th Turn, we had 1 Water Cultist on the board. That was it. In the next two turns, we killed the Water Cultist and drew 5 new monsters, for a net gain of 4 monsters. I was very lucky that both tiles had white triangles or Barrowin could have been taking damage as the monsters loaded up.
Playing solo, of course, there’s no one to help out. That’s especially useful when your Hero misses their attack. Somebody else can get a hit in. But since another Hero may well draw an Encounter Card (possibly damaging multiple Heroes) and add from 1 to 3 monsters to the board, the game actually can be harder with more players (or if you play multiple heroes, which I like to do). However, there is another advantage. Several scenarios involve mixing the tile that triggers the end game in somewhere between the eighth and thirteenth tiles. With more than one Hero, you have the chance to lay more tiles more quickly, triggering the end game sooner. Of course, if you have monsters around, and you trigger the end game, it can resemble being pinned down in a fire fight.
12th TURN
With things looking ugly, Barrowin swallows the Healing Ember, healing 4 points and getting her back up to 8. The card is discarded, but it was a big help. Still wielding her dwarven crossbow, Barrowin moves for a better line of sight and kills Doppleganger #2. And the treasure is a Blessing of Torm, granting an extra, immediate At Will power usage. She reloads the crossbow and fires again, killing Doppleganger #1. Woohoo!
ToEE doesn’t like for you to feel good for more than a few seconds, so the Encounter Card is a Thundering Boomerang: Two Attacks (+7/1 HP) on the Hero from the Cultists of the Howling Hatred. One hit, one miss.
The Earth Cultist and the Troglodyte move one tile closer. And for some reason, I completely forgot to move the Bugbear. Huh. He should have moved next to, but not attacked, Barrowin, stopping on the tile next to her. My mistake.
Potion of Knowledge – The rules are pretty straight forward, but there are some vague points. I have probably missed this but it doesn’t tell you which square to place a monster on when it moves from another tile. I could place the Bugbear as far away as possible from Barrowin on the proper tile. Or I could make sure it’s on a line of sight square for using her bow (if that matters in the game). Those two options are geared towards favoring the Hero. Or I could place it next to Barowin (which I did), favoring the Monster. A sensible choice would be to place it on the monster spawning square (or next to it if that’s occupied). I don’t think it’s addressed. I usually favor the monster just to be more realistic.
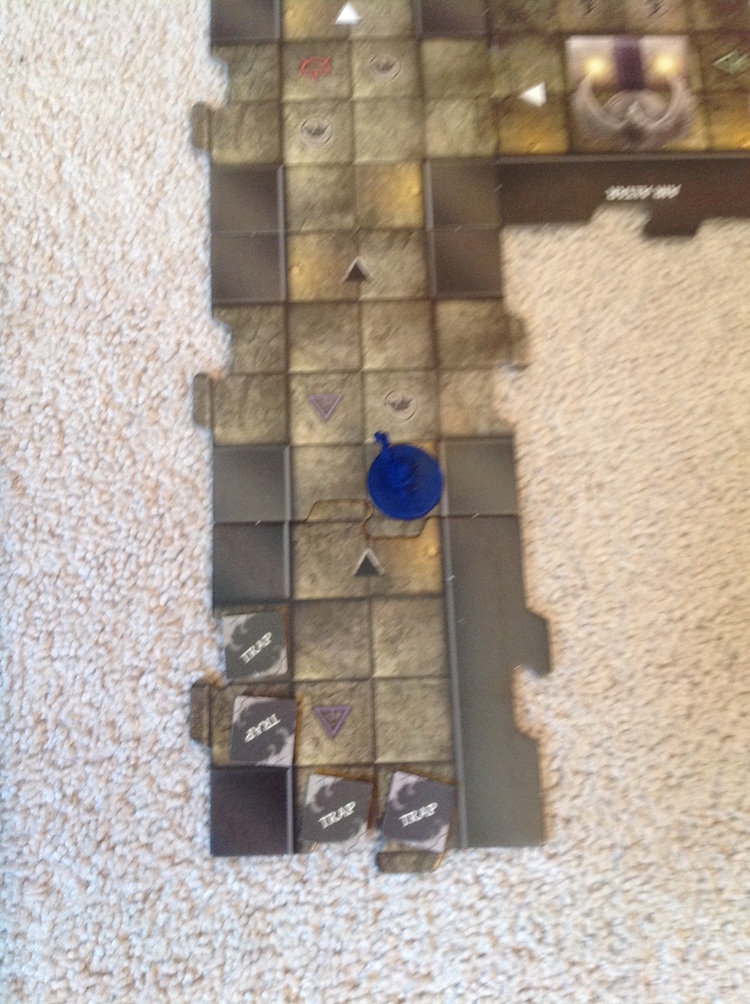
13th TURN
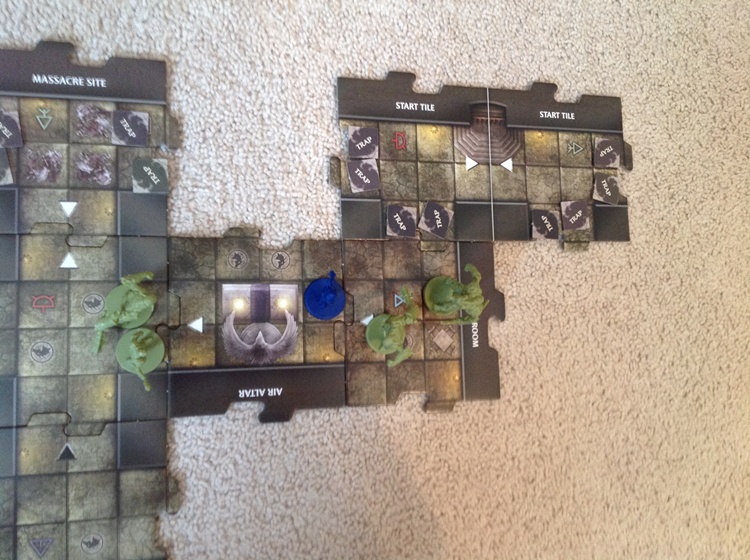
On fire with the crossbow, Barrowin pincushions the Troglodyte, killing it. It’s another 100 gold piece bag of treasure. She moves to the edge of a tile and it’s the Guard Room: we’ve triggered the endgame!
Instructions for this scenario are to place the Start Tile next to the Guard Room. The Guard Room gets 2 monsters while all 8 entrance squares to the Start Tile contain traps. All the Hero has to do to win is finish their Hero Phase on the Start Tile. Doesn’t matter if any monsters are remaining or not. Run away: run away!!
The monsters are another Bugbear (AC 15/HP 2) and a Gnoll Archer (AC 13/ HP 2).
If I had not home ruled that the monsters don’t attack on the turn they are placed, the Bugbear would move forward and attack Barrowin, while the Gnoll Archer would not move but shoot an arrow at the dwarf.
14th TURN

Assuming I’ve got this right, this is actually a bit of a flawed end game scenario. Barrowin simply moves to a Trap on the Start Tile, reveals it as ‘Clear’ and wins the game. Bit anticlimactic. In a prior, four player game, one of the Heroes was well away from the Guard Room/Start Tiles. So the other three Heroes had to fight monsters and draw Encounter cards for a few turns while the wandering dwarf made her way to them. So, number of Heroes does matter.
I played one more turn, and you can see that if Barrowin had to stay and fight (i.e., the tunnel had collapsed, ladder was missing, etc.), things were pretty darn grim.
SO….
The Doppelganger moving Barrowin back to the start actually helped a few times. With the multiple monster symbols on a tile, this is a really tough installment in the series.
Also, one of the reasons that Legend of Drizzt is the easiest game is because a few of the Encounter and Monster cards are ‘good,’ or have no effect. In Wrath and ToEE, they are always bad. And that really wears you down.
I like the Ranger and Fighter characters in this game, but the Cleric’s healing powers are almost essential. And I got very lucky to get some healing-oriented treasures. In earlier group play, we had noted how many 2 HP monsters there are. I didn’t draw too many today. And they’re a problem because Heroes rarely do more than 1 point of damage in ToEE. I contrast that with Legends of Drizzt, where even the halfling Rogue has a 2 point At Will attack at times.
Part of the Campaign feature is that you add certain cards to the deck, depending upon whether or not you used Healing Surges. You add “better” cards if you didn’t use any: “worse” cards if you did. I didn’t need any!
This is very playable solo game. But as with RPGs, there’s a lot added with the give and take, discussions of strategy and tactics and the fun of group play. And even playing alone, I recommend running at least two characters to add variety. You’ll have different kinds of attacks, you can have the Heroes work together, whatever. As long as you keep track of which Hero has which monsters, it’s pretty easy to play 2-4 characters.
If it turns out folks actually enjoyed reading this post, I might try the next scenario with two Heroes and see how that goes. All Monsters, Heroes and Villains (“Heroes and villains, just see what you’ve done.” If you got that reference, you have excellent musical taste) can be mixed into any game in the series. Maybe Drizz’t could come clean out the Temple of Elemental Evil!
Other Game/RPG-related posts I’ve done here at Black Gate:
The Lost Lands for Pathfinder
The Northlands Saga – Complete
The Warlords of the Accordlands
Judges Guild Premium Editions
Gary Gygax’s Role Playing Mastery
Munchkin!
Runebound
Runebound – The Sands of Al-Kalim
Runebound – The Mists of Zangara
Necromancer Games
Dungeons and Dragons Adventure Game System
Sherlock Holmes: Consulting Detective
221B Baker Street: The Master Detective Game
Conan: Age of Exiles
You can read Bob Byrne’s ‘The Public Life of Sherlock Holmes’ column here at Black Gate every Monday morning.
He founded www.SolarPons.com, the only website dedicated to the ‘Sherlock Holmes of Praed Street’ and blogs about Holmes and other mystery matters at Almost Holmes.
His “The Adventure of the Parson’s Son” is included in the largest collection of new Sherlock Holmes stories ever published. Suprisingly, they even let him back in for Volume IV!
And he’s been gaming since the mid-seventies. Earlier if you count Candy Land and Chutes and Ladders.